
With many kids currently on Christmas/Winter break, it is an exciting time to plan fun Christmas activities with them before the 25th!
We have a yearly tradition of going to our local mall and buying ornaments for our children. However, since Covid hit and with our area currently in lockdown, I decided to try making them instead!
 .
. 
This was so much fun to make with the kids (Theo was able to participate too)!
Joey helped me make the dough by adding in the ingredients, and didn’t mind getting messy when the time came to mix them all up. Again, getting your children involved with this process is great for their fine and gross motor skills.
You can always mix the ingredients in a bowl, but if you want to do it the fun way, get messy!
If you have the counter space and don’t mind getting messy, try dumping your dry ingredients on to your table/counter. Make a well in the middle of your ingredients and slowly get your kids to help you add the water.
Salt Dough Recipe for Christmas Ornaments
– 1 Cup Flour
– 1 Cup Salt
– 1/2 Cup Water
1) I mix the salt & flour together first, then slowly add the water. You may not need all of your water so add it slowly!
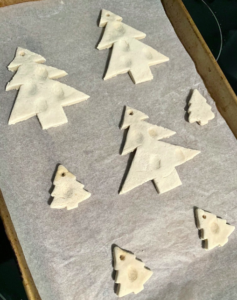
2) Knead the dough together until it’s pretty smooth, roll it out, and (with parent/adult supervision), use cookie cutters to make the shapes! We didn’t have a large Christmas tree cookie cutter for Joey, so I used a knife to cut out the shape instead.
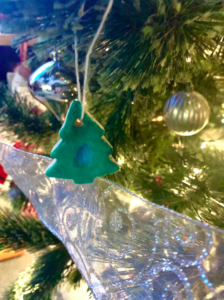
3) Before you bake them, get your kiddos to make 3-5 fingerprint indentations in the dough. I made small Christmas tree shapes for Theo’s ornaments and only used 1 fingerprint (I thought it looked cute for his first ever ornament).
4) Grab a pen, a screw, a straw, whatever you find around the house to poke holes at the top of your ornaments! You’ll need this to run a string through the ornament in order to hang them on your tree later.
5) Place the ornaments on parchment paper and bake your ornaments in the oven at 170 Degrees F for about 2 hours. If they’re smaller, your ornaments probably won’t need a full 2 hours so keep an eye on them just in case!
I also usually let my baked dough sit for a few hours or overnight to harden before we paint them.
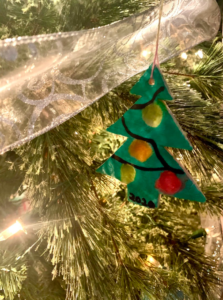
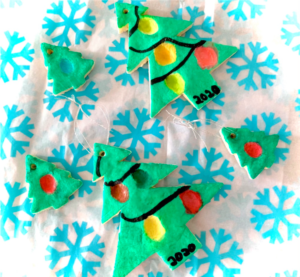
I set Joseph up with his paints and paintbrush. He carefully painted each fingerprint inside of his ornaments a different colour (he made 3 different ornaments – for our tree and his grandparents’ trees). Then, he asked me to help him paint the rest of the tree green.
Once your paint has dried completely, grab a sharpie and write whatever you like on the ornaments (child’s name, date, etc).
Once the sharpie has dried, I use Mod Podge and a brush to seal the front and back of the ornament.
Finish your craft by running a decorative piece of string through the holes at the top of the ornament and voila!
Enjoy the Holiday break!
TKM
xo