Wondering how to start a blog?
“What will my blog be about?”, “How often should I post?”, “Where do I even start?”
These are all questions that are probably floating around in your mind.
Blogs are a super fun way for you to share your personal story, make money, and/or interact with other readers that are going through something similar as yourself.
It’s a wonderful way to connect with the world around you – whether it is with you and your reader, or vice-versa.
If you are interested in starting your own blog/website, I have some helpful tips for you that I’ve laid out in this post!
I created my website and blog not too long ago, and I can tell you that it is something I constantly look forward to working on every day.
I started out like many of you – I didn’t know about domains, website hosting, WordPress, and more. But quite honestly, once you start, it only gets easier as you go!
Let’s dive right in to blogging!
1. What Do I Want To Write About?
My first tip – choose your niche.
What is it that you are good at? What is it that you are super knowledgable about? What are you so passionate about that you could write topics about this specific niche at least once or twice a week (if not more)?
Think about the answer to these questions. It should pop into your head within ten seconds.
Look at my blog for example. I had so much information (and still do of course!) that I wanted to share about crafts, motherhood, my experiences, DIYs, recipes, and more!
I love crafting my bows for clients, but I also love the content that I share on my website to help parents/caregivers/teachers too!
My website is about all of the above. My niche is motherhood, motherhood tips, and children’s activities.
The best part is that I can continue to write about these topics on my blog because it’s something that I am continuously experiencing as a mother and as an ECE.
What really helped me once I discovered my niche was writing all of my ideas down on paper!
Take out a small notebook. Start compiling lists of topics that you want to write about on that particular niche.
Are you thinking faster than you can write?
Then that is your niche!
I couldn’t stop writing in my notebook when I first started. I had all of these ideas written down and could not wait to start writing about them in my blog!
If you want to take your website/blog even further – my website is ever growing, but I knew I wanted to have different Sections on my website with Subsections.
For example, I now have a section on crafts, and within that section are many different types of crafts (Sensory crafts, Literacy crafts, etc).
Your website doesn’t have to have all of these sections of course, but I find that it’s nice to have portions of my website where I can compile my blogging tips, tricks, crafts, and recipes for my viewers!
Now ask yourself – is my niche something I can write about every week? Will I know enough about this topic to grab the attention of my target audience?
Which brings me to my next tip!
2. Write For Your Intended Target Audience.
Yes, sometimes (but not often), your niche might change after a certain period of time, but think about who your target audience is for now!
I generally write for mothers, caregivers, parents in general, and teachers.
Write about topics that will generally interest your target audience. Be genuine about what you write. Be knowledgable too.
3. Choose Your Blog Name!
After you have decided what you are going to write about, pick your blog name!
You want it to be catchy, and 99% of the time I would recommend that your Blog Title/Name has something that has to do with your specific niche.
For example – my married name begins with a “K”. I love creating and making crafts with my children! Ever since I was a kid, I have loved making/creating things. It is something that I did full-time as an ECE!
This is how I came up with my name: That Krafty Mom!
If you’re having trouble coming up with a name, I have a great method that will help you to narrow it down!
- Take a piece of paper. Not your phone, not your computer. A piece of paper.
- Write down your topic. For example, mine would be “crafting”.
- Draw a circle around that word/words. Like a bubble.
- Now, draw small lines branching out from that bubble and make a word web from this. Brainstorm with similar words that you can think of revolving around your niche/topic. You will eventually have a sheet of paper with different words that are synonyms or that describe your niche.
(For example, words that I might have drawn down relating to “crafting” would have been “creating”, “drawing”, “painting”, “handmade”, “creative”, etc).
Now, try to create your blog name by using one or some of those words that relate to your topic!
4. Think About Purchasing A Domain Name.
If you want a successful blog, you will need to invest some money into purchasing a domain. This is your website’s name. For example, mine is http://www.thatkraftymom.ca.
If you want people to take you seriously, it is best to purchase your own domain name and look into hosting companies (which I will talk about in my next tip).
Your domain name is essentially the name of your blog.
One way of purchasing your domain name or seeing if it’s even available is to visit http://www.godaddy.com
If your desired name is taken, for example, http://www.mynamehere.com, try a “.ca” instead. So, try looking into http://www.mynamehere.ca.
5. Use a Hosting Company like BlueHost to Create Your Website/Blog.
Once you purchase your domain name, you will want to use a Hosting Company like Bluehost.com to edit and create your blog!
Bluehost will basically make it possible for you to create, store, and post your blogs on your very own website!
Within Bluehost is blogging software (called WordPress) which makes it easy for beginners especially to write posts for their blog, to edit the appearance of their website, and to customize pages within that website.
Bluehost is one of the most popular Hosting Companies for websites.
Within WordPress are Plugins that you can download to make your blogging even easier. Additionally, there are WordPress Plugins that allow you to have a more professional looking website.
For example, if your niche is cooking, you can easily share professional looking recipes with a Recipe Maker Plugin.
All you have to do is download and install the Plugin (like you would for a cellphone app), and fill in your information into the recipe maker.
WordPress will then do all of the magic for you! You can check one of my blogs here to see an example of a Recipe Maker Plugin!
6. Consider Building Your WordPress Website With Elementor.
Within WordPress is a downloadable software called Elementor.
I highly, highly recommend Elementor for WordPress users who are just starting out with their website.
Elementor allows WordPress users (such as myself) to easily click and drag elements like “Add A Gallery”, or “Add A Text Box” into the pages of your website.
Basically, Elementor is a page builder Plugin that let’s you easily edit any element of your website.
If you are new to blogging and creating websites, I would definitely use the Elementor software found within WordPress!
7. Buy A Theme, Make It Simple!
Yes, you can definitely try to build a website from scratch once you have Bluehost and Elementor.
But honestly, if you are just starting out and especially if you are a busy mom like me, try using a WordPress/Elementor friendly theme that does all of the prep work for you!
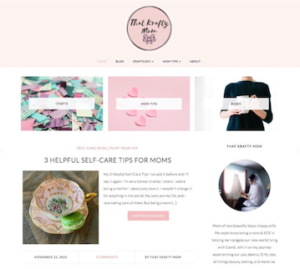
I am currently using the “Rachel” theme by Bluchic.com. It is a theme intentionally geared towards blogging.

Bluchic has so many kinds of elegant WordPress/Elementor friendly themes, especially for blogging!
This makes it much easier for me to post and edit my blogs.
The colours, design, and font choices are already completed for you!
You can still customize your website with WordPress/Elementor once the theme has been installed, and the great thing about their themes: they are SEO friendly (which is important for bringing traffic to your website when blogging).
SEO is “Search Engine Optimization”. This is something that you will learn about once you begin your blog. All SEO is (in a nutshell) is how you write your blog to optimize bringing in the most amount of traffic to your website.
With Bluchic themes, all you have to do is:
- Write what you love, insert your pictures and bio information, and links to your Social Media accounts!
Basically, Bluchic makes it easy to showcase your talent without the hassle of designing your website first.
Like I said previously, even with these beautiful themes, you can still use WordPress/Elementor to edit and move around certain items on your website to make it special, to make it your own.
Bluchic made my life and blogging that much simpler. Not to mention the stunning designs!
Bluchic will give you a step-by-step guide to follow to easily download and incorporate their theme into your website once you’ve purchased a theme!
Click here to take a peak at their beautiful themes!
I truly hope my tips help!
Blogging is a lot of fun, and can be a great way of bringing in some extra income if that’s what you’re looking at getting into as well!
Remember to be genuine, get creative, and have fun blogging!
TKM
Disclaimer: This post contains an affiliate link. This means I will earn an affiliate commission if you click and/or make a purchase through the link (at no extra cost to you). And of course, I only recommend the products that I love and have used myself.
